[js] three.js로 커스텀3D 물체 불러오기
잠깐❗
자바스크립트를 처음 하는 분 기준으로 진행하겠습니다.
저도 3일전에 처음 자바스크립트를 threejs로 바로 시작했
기에 얼마나 어려운지 잘 알고 있습니다. 그렇기에 처음 시작하시는 분들은
저와 같이 어려움을 겪지않고 쉽게 하시길 바라고자 이렇게 직접 블로그에 남기
게 되었습니다. 그리고 저에게 정말 많은 도움을 주신MincoMK선생님
다시 한번 감사드립니다!
확인할 것!
- checklist 1
vs코드를 설치했는가?- checklist 2
Node.js를 설치하였는가?- checklist 3 Node.js의
시스템변수, 환경변수를 설정하였는가?
(내가 참고할 것)
Node.js 설치 후 npm폴더를 만들어
환경변수 C:\Users\rhwns\AppData\Roaming\npm
시스템 변수
nodejs 설치한 경로명(바탕화면에 nodejs1 폴더를 만들어 그안에 설치하였다)
C:\users\rhwns\desktop\nodejs1\nodejs;
1
sketchfab.com에서 먼저 gltf 파일로 다운받기커스텀 3D물체 다운받으러가기 ***
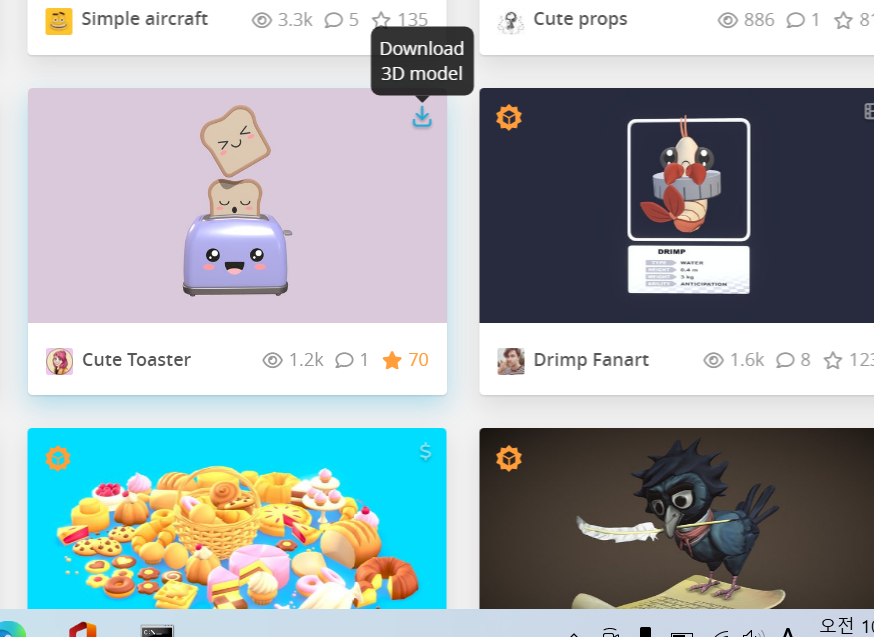
저는 바탕화면에 toaster 라는 폴더 생성후 그곳에 토스터 기계를 toaster라는 폴더안에 다운로드 받았어요ㅎ
다운로드 받으실땐 무조건 glTF 파일로 다운로드 받아주세요.
2 threejs 모듈 생성
잠깐❗ 하시기 전 4번의 설명을 보고 하셔도 늦지 않습니다!
자 저의 경우는 cmd에서 cd desktop\toaster 통해 저의 폴더 경로로 입장한 후 아래 문구를 입력합니다
1
npm install three
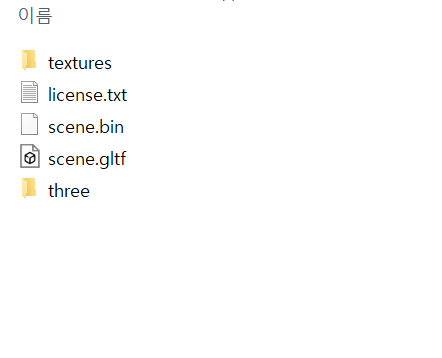
그러면 이제 toaster 라는 폴더에 node_modules 라는 폴더가 생길텐데 그 안에 들어가면
폴더 three이것만 toaster 폴더에 놓아두고 나머지 node_moudles 폴더 삭제합니다
결과는 아래와 같이 되야합니다.
3 저 폴더 안에서
index.html파일을 만듭시다
! 치고 엔터를 쳐서 기본틀 생성합시다
1
2
3
4
5
6
7
8
9
10
11
12
<!DOCTYPE html>
<html lang="en">
<head>
    <meta charset="UTF-8">
    <meta http-equiv="X-UA-Compatible" content="IE=edge">
    <meta name="viewport" content="width=device-width, initial-scale=1.0">
    <title>Document</title>
</head>
<body>

</body>
</html>
이제 <body> 바로 아래에 이렇게 수정해줍시다
1
2
3
<body>

    <canvas id="canvas"></canvas>
4 이제 모듈 관련 입력해줍시다
```html
1
2
3
4
5
6
7
8
9
10
11
12
13
14
15
16
17
18
19
20
21
22
23
24
이 문장을 이렇게 추가하여 수정해줍시다

  <br>
  <br>

```html
  <canvas id="canvas"></canvas>

<script type="importmap">
    {
        "imports": {
            "three": "./three/build/three.module.js",
            "three/examples/jsm/loaders/GLTFLoader":"./three/examples/jsm/loaders/GLTFLoader.js",
            "three/examples/jsm/controls/OrbitControls": "./three/examples/jsm/controls/OrbitControls.js"
        }
    }
</script>

--------------------이 줄은 추가하지 마세요 잠시 설명을 위해 분리해놓았습니다-----------------------------

    <script type="module">
        import { GLTFLoader } from 'three/examples/jsm/loaders/GLTFLoader';
        import { OrbitControls } from 'three/examples/jsm/controls/OrbitControls';
        import * as THREE from 'three';
만약에 “npm install three 입력시 모듈이 너무 많아서 노트북 속도가 느려져서 다운받기 싫다!” 하시는 분들은
npm install three를 입력하지않고 위에것만 쓰시면 되고
나는 정석으로 가겠다 하시는 분은 npm intall three를 콘솔창에 입력하시고 아래의 구문만 쓰시면 되는데
저의 경우는 npm install three를 입력하고 저 2개를 같이 배치해두니 되길래 저는 이 방법을 사용하였습니다.
※ 참고
- GLTFLoader를 임포트 하겠다는 것은 GLTF사진을 가져와서 쓰겠다 뜻
- OrbitControls를 임포트 하겠다는 것은 물체를 마우스로 조절할 수 있게 하겠다는 뜻
5 3D물체 기본설정
이어서 아래에 붙여줍시다
1
2
3
4
let [width, height] = [window.innerWidth, window.innerHeight];
let aspectRatio = width / height;
let canvas = document.querySelector('#canvas');
Object.assign(canvas, { width, height });
물체 보이는 높낮이에 관한 설정입니다!
아래에 이어서 붙입시다
1
2
3
4
5
6
7
8
9
10
11
12
let scene = new THREE.Scene();       // 3D물체 장면을 생성하기 위해 scene이라는 변수를 만들어주었다.

scene.background = new THREE.Color('#ffffff');               // 배경색 설정

let light = new THREE.AmbientLight(0xffffff, 1);            // 이 두문장 추가하면 물체(토스트기계)를 보이게해줌
scene.add(light);


let renderer = new THREE.WebGLRenderer({                 // 브라우저를 켰을때 물체장면을 보여주는 함수입니다
    canvas,
    antialias: true
});
6 카메라설정 + 마우스로 움직이게 하기
이것도 아래에 이어서 붙입시다
1
2
3
4
5
6
let camera = new THREE.PerspectiveCamera(90, aspectRatio, 1, 1000);             // 카메라 관점 설정 (숫자 변경을 통해 조절 가능)
camera.position.set(500, 500, 500);          //카메라 보이는 각도 설정 (숫자 변경을 통해 조절가능)


let controls = new OrbitControls(camera, renderer.domElement);            // 마우스로 움직이게 할 수 있는 기능
controls.target.set(0, 0, 0);
이제 이문장을 추가해봅시다
1
controls.autoRotate = true;         // 자동회전 O
7 마무리작업
1
2
3
4
5
6
7
8
9
10
11
12
13
let loader = new GLTFLoader();
loader.load('./scene.gltf', function(gltf){           // 안에 내부 설계를 했으니 이제 뚜껑으로 덮어줘야한다   그런 비슷한 존재
    scene.add(gltf.scene);


    (function animate() {
        renderer.render(scene, camera);
        controls.update();                //animate() 함수안에 controls.update() 추가함으로써 매프레임마다 자동으로 돌아감)
        requestAnimationFrame(animate);             그리고 프레임마다 조금씩 각도를 높여줌
    })(); //requestAnimationFrame              // 이거는 성능에 따라 프레임 수를 조절해서 몇 밀리초 뒤에 다음 프레임을 호출할지 결정
  });
완성된 index.html
1
2
3
4
5
6
7
8
9
10
11
12
13
14
15
16
17
18
19
20
21
22
23
24
25
26
27
28
29
30
31
32
33
34
35
36
37
38
39
40
41
42
43
44
45
46
47
48
49
50
51
52
53
54
55
56
57
58
59
60
61
62
63
64
65
66
67
68
69
70
71
72
73
74
75
<!DOCTYPE html>
<html lang="en">
<head>
    <meta charset="UTF-8">
    <meta http-equiv="X-UA-Compatible" content="IE=edge">
    <meta name="viewport" content="width=device-width, initial-scale=1.0">
    <title>Document</title>
</head>
<body>

    <canvas id="canvas"></canvas>

<!-- 2 이걸 적어주고 시작 -->
<script type="importmap">
    {
        "imports": {
            "three": "./three/build/three.module.js",
            "three/examples/jsm/loaders/GLTFLoader":"./three/examples/jsm/loaders/GLTFLoader.js",
            "three/examples/jsm/controls/OrbitControls": "./three/examples/jsm/controls/OrbitControls.js"
        }
    }
</script>

    <script type="module">
        import { GLTFLoader } from 'three/examples/jsm/loaders/GLTFLoader';
        import { OrbitControls } from 'three/examples/jsm/controls/OrbitControls';
        import * as THREE from 'three';

        let [width, height] = [window.innerWidth, window.innerHeight];
        let aspectRatio = width / height;
        let canvas = document.querySelector('#canvas');
        Object.assign(canvas, { width, height });

         //3 이제 3D물체 장면을 만들자
         let scene = new THREE.Scene();

         scene.background = new THREE.Color('#ffffff');

         //이문장 추가하면 토스터기계 보임
        let light = new THREE.AmbientLight(0xffffff, 1);
        scene.add(light);
        //


        //4브라우저에 물체장면을 보여주소
        let renderer = new THREE.WebGLRenderer({
            canvas,
            antialias: true
        });

        //5 카메라 ------- 아래 문장 추가 후 render.render(scene, camera) 바꿔주자
        let camera = new THREE.PerspectiveCamera(90, aspectRatio, 1, 1000);
        camera.position.set(500, 500, 500);

        let controls = new OrbitControls(camera, renderer.domElement);
        controls.target.set(0, 0, 0);
        controls.autoRotate = true;  //controls.autoRotate =true;  자동회전O
        // -------------------------
        let loader = new GLTFLoader();
        loader.load('./scene.gltf', function(gltf){
            scene.add(gltf.scene);

            (function animate() {
                renderer.render(scene, camera);
                controls.update(); //animate() 함수안에 controls.update() 추가함으로써 매프레임마다 자동으로 돌아감)
                requestAnimationFrame(animate);  //그리고 프레임마다 조금씩 각도를 높여줌
            })(); //requestAnimationFrame 이거는 성능에 따라 프레임 수를 조절해서 몇 밀리초 뒤에 다음 프레임을 호출할지 결정
        });


    </script>
</body>
</html>

<!-- This work is based on "Cute Toaster" (https://sketchfab.com/3d-models/cute-toaster-9f6d03cf29f245ad97c51a56e9b1ca90) by blkelly (https://sketchfab.com/blkelly) licensed under CC-BY-4.0 (http://creativecommons.org/licenses/by/4.0/) -->
8 확인하기
저장 한번 해주고 cmd로 들어가서 원하는 경로에 들어가서 이제 입력합시다
저의 경우는 cd desktop\toaster 로 경로를 맞추고 시작하였습니다
1
2
npm i http-server -g               // 글로벌 http 서버를 설치하겠다
npx http-server -p 8080            // 끝자리가 8080인 서버를 만들자
그 후 생성된 http://127.0.0.1:8080 들어가서 ctr shift r(강력한 새로고침) 한번 눌러줍시다.
아래 사진을 클릭하면 제 취미공간으로 이어집니다 ㅎㅎ 여기에서 메모 및 일상을 기록하는데 놀러오실 분들은 언제나 환영합니다!
링크로 이동하려면 사진을 클릭
참고
‘애플코딩’ 웹 포트폴리오에 간지나게 3D 모델을 추가해보자 (Three.js)
많은 도움을 주신 선생님
‘MincoMK’
선생님 깃허브 https://github.com/MincoMK?tab=repositories
선생님 디스코드 닉네임 ! !#0123